
Assembling your Ashley bed is a straightforward process when you follow the provided instructions carefully. This guide is designed to help you navigate the assembly process efficiently, ensuring your bed is both safe and sturdy. The instructions are comprehensive, covering all necessary steps to complete the assembly without complications.
Before you begin, it is essential to gather all the tools and parts included in the package. Most Ashley beds require basic tools like a screwdriver and a hammer, though specific models may need additional equipment; Always check the packaging for small parts that may have come loose during shipping.

Remember, proper assembly ensures the bed’s stability and longevity. Take your time to follow each step in order, and don’t hesitate to seek assistance if needed. A well-assembled bed will provide years of comfort and support.
- Ensure all parts are accounted for before starting.
- Use the recommended tools to avoid damaging the furniture.
- Follow the assembly steps in the specified order.
By adhering to these guidelines, you can successfully assemble your Ashley bed and enjoy a well-crafted piece of furniture.

1.1 Overview of the Assembly Process
The assembly process for an Ashley bed is a systematic sequence of steps designed to ensure the furniture is built safely and correctly. While the exact steps may vary slightly depending on the specific model, most Ashley beds follow a similar assembly pattern. This overview provides a general understanding of what to expect during the assembly process, helping you prepare and approach the task with confidence.
The assembly typically begins with unpacking and organizing all components. This includes the headboard, footboard, side rails, slats, and hardware such as bolts, screws, and Allen wrenches. Many Ashley bed models include pre-drilled holes and labeled parts, which simplifies the process. However, it’s crucial to carefully review the instructions and match each part to its corresponding label before starting.
Once all components are accounted for, the next step involves assembling the bed frame. This usually starts with attaching the side rails to the headboard and footboard. Some models may require additional support, such as center rails or slats, to ensure the bed is sturdy and can withstand weight evenly. These supports are typically secured using bolts or screws, and proper tightening is essential to avoid wobbling or instability.
After the frame is fully assembled, the next step is to attach any additional features, such as storage drawers or upholstered panels. Some Ashley beds come with optional components like under-bed storage or adjustable headrests, which may require extra steps to install. Be sure to follow the manufacturer’s guidelines for these add-ons, as improper installation could compromise the bed’s structural integrity.
Finally, the assembly process concludes with a series of final checks. This includes ensuring all bolts are tightened securely, the bed is level, and there are no sharp edges or protruding hardware. It’s also a good idea to test the bed’s stability by gently rocking it or applying moderate pressure to ensure it remains firm and steady.
Steps to Expect During Assembly
- Unpacking and Inventory: Carefully unpack all components and cross-reference them with the parts list provided in the instructions. This step is critical to ensure no parts are missing or damaged.
- Assembling the Frame: Attach the side rails to the headboard and footboard using the provided hardware. Ensure all connections are secure and properly aligned.
- Adding Support Structures: Install slats, center rails, or other support components to enhance the bed’s stability and weight capacity.
- Attaching Additional Features: If applicable, install storage drawers, upholstered panels, or other optional components according to the manufacturer’s instructions.
- Final Inspection: Double-check all connections, ensure the bed is level, and test its stability before use.


Throughout the assembly process, it’s important to work methodically and avoid rushing. Many Ashley bed models are designed to be assembled by two people, as some components may be heavy or unwieldy to handle alone. If you’re unsure about any step, consider consulting the instructions again or reaching out to customer support for clarification.
By following the outlined steps and paying close attention to detail, you can successfully assemble your Ashley bed and enjoy a sturdy, comfortable, and stylish piece of furniture for years to come.

Tips for a Smooth Assembly Process
- Always use the tools recommended in the instructions to avoid damaging the hardware or furniture.
- Keep small parts, such as bolts and screws, organized to prevent misplacement.
- Work in a spacious area to avoid clutter and ensure easy access to all components.
- Consider enlisting a second person to assist with heavier or larger parts.
Understanding the overall assembly process beforehand can significantly reduce frustration and save time. With careful preparation and attention to detail, assembling your Ashley bed can be a manageable and rewarding experience.
Why an Overview is Important
An overview of the assembly process provides a clear roadmap, helping you anticipate what’s needed and how to approach each step. It also highlights the importance of preparation, such as gathering tools and organizing parts, which are critical to a successful assembly. By familiarizing yourself with the process beforehand, you can tackle the task with confidence and ensure a professional-grade result.
1.2 Importance of Following Instructions
Following the assembly instructions provided with your Ashley bed is crucial for ensuring the final product is safe, stable, and functions as intended. While it may be tempting to skip steps or deviate from the guidelines, doing so can lead to a variety of issues, including structural instability, safety hazards, and potential damage to the furniture. Adhering to the instructions ensures a successful assembly process and helps you enjoy your new bed for years to come.
The instructions are carefully crafted by the manufacturer to guide you through the assembly process in a logical and efficient manner. They are based on extensive testing and quality assurance processes, ensuring that every step is necessary and contributes to the overall integrity of the bed. By following these steps, you can avoid common pitfalls, such as misaligned parts, loose connections, or improper use of hardware, which could compromise the bed’s stability and safety.
Safety Considerations
Safety is one of the most critical reasons for following the assembly instructions. Furniture assembly often involves heavy components, sharp edges, and small parts that can pose a hazard if not handled properly. The instructions include safety precautions, such as wearing protective gear or ensuring proper lifting techniques, to minimize the risk of injury. Additionally, proper assembly ensures the bed is sturdy and less likely to collapse or wobble, which could lead to accidents, especially in households with children or pets.

Preventing Damage to the Furniture
Improper assembly can result in damage to the bed’s components, such as stripped screws, scratched surfaces, or broken frames. The instructions are designed to prevent such issues by specifying the correct tools, techniques, and sequences for assembly. For example, using the wrong screwdriver or overtightening bolts can damage the hardware or the bed’s finish. By following the instructions, you can ensure that each part is installed correctly, preserving the bed’s appearance and functionality.
Ensuring Structural Stability
A bed is a piece of furniture that must support significant weight, and its structural integrity depends on proper assembly. If the bed is not assembled correctly, it may sag, wobble, or even collapse under weight, leading to potential injuries and rendering the bed unusable. The instructions provide detailed guidance on how to secure each component, ensuring the bed is stable and can support the intended weight capacity. This is especially important for larger beds, such as king-size models, which require additional support to maintain their structural integrity.
Warranty and Liability Considerations
Ashley Furniture, like many manufacturers, includes disclaimers in their instructions stating that they are not liable for damages or injuries resulting from improper assembly. By failing to follow the instructions, you may void the warranty or assume responsibility for any issues that arise. Proper assembly, on the other hand, ensures that the bed meets the manufacturer’s quality standards, providing peace of mind and protecting your investment in case of defects or malfunctions.
Time and Effort
While it may seem time-consuming to follow every step in the instructions, doing so ultimately saves time and effort in the long run. Skipping steps or ignoring warnings can lead to mistakes that require disassembly and reassembly, doubling the time and frustration. By adhering to the instructions, you can complete the assembly efficiently and avoid unnecessary delays or complications.
Tips for Following Instructions Effectively
- Read the Entire Manual First: Before starting the assembly, read through the entire set of instructions to understand the process and identify any tools or parts you’ll need.
- Organize Parts and Tools: Sort and label all components and hardware to ensure they are easily accessible during assembly.
- Follow the Sequence: Complete each step in the specified order, as skipping ahead can lead to misalignment or instability.
- Double-Check Connections: Ensure all bolts, screws, and other hardware are securely tightened to the recommended torque to prevent loosening over time.
- Seek Assistance When Needed: Many Ashley beds are designed to be assembled by two people, so don’t hesitate to ask for help with heavy or complex parts.

Preparation
Before starting the assembly of your Ashley bed, proper preparation is essential to ensure a smooth and efficient process. Begin by gathering all the necessary tools and hardware included in the package. A screwdriver and hammer are typically required, though specific models may need additional tools. Ensure all parts are accounted for by carefully checking the packaging, as small components may have come loose during shipping.
Organize the parts and hardware in a clear workspace to avoid confusion and save time. A large, flat surface is ideal for assembling larger components. Remove any protective packaging from the parts to prevent damage during assembly. Double-check the instructions to confirm the required tools and ensure you understand the assembly sequence before starting.
For safety, wear protective gear like gloves and eyewear, especially when handling sharp edges or heavy components. If the bed requires lifting, have a second person assist to prevent injury. Proper preparation ensures that the assembly process is safe, efficient, and free from unnecessary complications.
- Gather all tools and hardware before starting.
- Check for loose or missing parts in the packaging.
- Organize components in a clear workspace.
- Review the instructions to understand the assembly sequence.
Being well-prepared will help you complete the assembly confidently and efficiently.
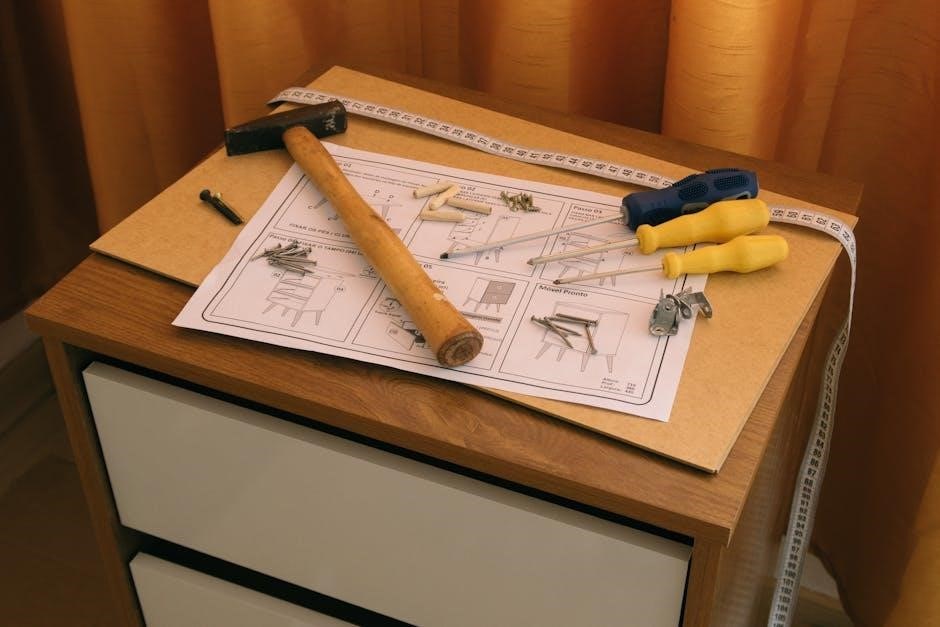
2.1 Tools Required
When assembling your Ashley bed, having the right tools readily available is crucial to ensure a smooth and efficient process. Most Ashley bed models require a standard set of tools, which are typically not included in the package. Below is a detailed list of the tools you will need to successfully complete the assembly.
Essential Tools
The primary tools required for assembling an Ashley bed include:
- Screwdriver: A flathead screwdriver is essential for driving screws and bolts. Some models may also require a Phillips-head screwdriver for specific screws.
- Hammer: A hammer is necessary for tapping parts into place gently, ensuring they fit securely without causing damage.
- Allen Wrench: Many Ashley beds use bolts with Allen wrench sockets. A 3mm or 4mm Allen wrench is commonly required, depending on the model.
- Pliers: Needle-nose pliers can be helpful for reaching small spaces or gripping tiny parts during assembly.
- Measuring Tape: While not always necessary, a measuring tape can be useful for verifying the alignment of components.
These tools are fundamental for completing the assembly process. Ensure they are in good condition and easily accessible before you begin.
Optional Tools
Depending on the specific model of your Ashley bed, you may find the following tools helpful:
- Power Drill: For models with pre-drilled holes or requiring additional drilling, a power drill can save time and effort.
- Socket Set: Some beds may use bolts that require a socket wrench for tightening or loosening.
- Clamps: Clamps can be useful for holding parts in place while assembling or adjusting components.
- Work Light: A well-lit workspace is essential for visibility, especially when working with small parts or intricate instructions.
While these tools are not always required, they can make the assembly process more convenient and efficient.
Additional Tips
To ensure a seamless assembly experience, consider the following tips:
- Organize Your Tools: Keep all tools in a designated area, such as a toolbox or tray, to avoid misplacement.
- Check Tool Condition: Ensure your tools are in good working condition. Dull or damaged tools can complicate the assembly process.
- Use the Correct Tool for the Job: Avoid using tools improperly, as this could damage the bed or the tool itself.
- Follow Safety Guidelines: Always wear safety goggles and gloves when using power tools or handling sharp edges.
By gathering and organizing the necessary tools beforehand, you can focus on following the assembly instructions without interruption or delay.